
This was my creation for a colour challenge this week, using Gold, Lost Lagoon, Pear Pizzazz, So Saffron, and Crisp Cantaloupe. I've been loving my Envelope Punch Board lately and wanted to use my fringe scissors, so I put them together and created this.
.jpg)
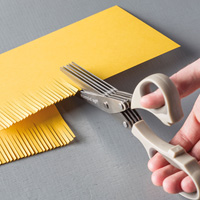
The box itself was create with the punch board, and then the fringe scissors got to work on the flowers.
.jpg)
.jpg)
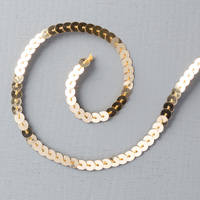
It's no secret that I love gold, and I know I say this all the time, but the gold touches are a little something special. They really kick it up a notch. All of the embellishments are secured to the belly band, which can be removed simply by sliding it off - nothing needs to be destroyed to access the box. I love how all of this came together!
Thanks, as always, for stopping in today - I'm so happy to have people popping in to see what I'm up to! More creations are always being shared on my Instagram account, and I'd love to see what you're up to on there, too!
HOW TO: This box is very easy to making with the Stampin' Up Envelope Punch Board. Just follow these easy steps:
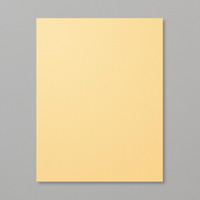
1. Cut your cardstock to 8x8" square.
2. Using your envelope punch board, punch and score one side at 3-1/2" and 4-1/2". Rotate 90 degrees, and repeat. Repeat until all four sides are done.
3. Round the corners of your square.
4. Fold all seams inward. Cut the smallest corner square on opposing sides to create "flaps" to secure the box.
5. Using Sticky Strip, fold your box together. Add belly band to decorate.
Cheers!


Found you on Instagram! This is perfect for little thank you cards! Will case this for my friends bday gift! :) how did you make the yellow flower??
ReplyDeleteHi Holly! Thanks for the comments and the Instagram follow! I'll try to explain this simply -
DeleteCut a long, skinny piece of paper. For our example, let's say 2"x10".
Put a line of Sticky Strip along the bottom edge and fold in half (it will now measure 1"x10".)
Put another line of sticky strip along that same bottom edge, but leave the plastic cover on it.
Using your fringe scissors, cut the folded edge into fridge, going all the way down the length of the piece without cutting through the tape.
Peel the plastic off the sticky strip and roll your strip of paper up tightly.
Squeeze firmly to make sure it's adhered properly, then using your fingers, flatten and push the petals out until your flower takes shape.
Hope that helps! Happy crafting!
After looking at it closely, I kindve figured that's how you would make it! Making this today after church! Thanks so much! (Feel free to follow back on IG - hollystene
Delete