

Hello friends, and welcome back for another Stampin' Up! Artisan Design Team Blog Hop! We are so excited to be sharing boxes and bows with you today - twenty stops around the world for perfect packaging! You're currently in Calgary, Canada with me, Shannon, and you'll be off to see Steffi in Germany next - please don't hesitate to use your "Translate" button on your browser to ensure you're keeping up with all of us!
I decided to use the Boxes and Bows theme to create a suite of packaging perfect for a little boy's baby shower - and my first step was a gift box!

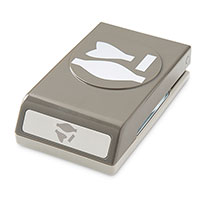
The Gift Box Punch Board makes creating boxes SUPER easy, and I wanted to modify mine a little bit to make it easier for clumsy hands - like mine! - that don't enjoy the criss-cross-closure. I much prefer a classic-top tab-and-tuck closure, so that's exactly what I decided to make!

Want to know how to create a tab-and-tuck closure? I whipped up a video tutorial for you at the last minute - so pardon my rushing, my shaky hands, and my bad Anglo accent as I pronounce fellow-Artisan Rachel's name!
Because I'm sharing a boy-themed suite, I wanted to add some boy-bows; they don't have to be girly! The Bow-Builder Punch makes perfect little bowties, too, and there's nothing cuter than stringing them together in a garland. These were punched with DSP (from Schoolhouse and Bohemian collections) in Daffodil Delight, Island Indigo, and Tangerine Tango. So cute!
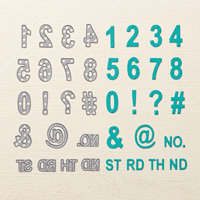
Since so many hosts like to do favours for their guests, a few tiny boxes would do just fine! The small gift box would make a perfect little building block, wouldn't it? Fortunately, the Little Letters and Little Numbers Framelits are perfect for whipping them up!

Adding an A-B-C and 1-2-3 completes the look; they're just darling and they come together so quickly. It would be a breeze to make these for a crowd!
And last but not least, no gift is complete without a card! I was itching to create a vintage-striped onesie- my son had one just like this in brown, orange, and yellow, and I wanted to make a tiny paper version. I love how it turned out!

Combined with touches of vellum, DSP, ribbon and sequins, there's a lot of fun packed into this card!
I love how the whole ensemble came together; perfect for a new mom and her little man!

Next up - let's see what gorgeous project Steffi has for us this week! Click the button below to carry on to her blog.

Thanks so much for stopping by and joining our blog hop!
Cheers,
Shannon


I love this Shannon! Great color combo, and the bow tie garland is so adorable.
ReplyDeleteGreat colors and project idea!
ReplyDeleteSo vibrant and fun Shannon. Can't wait to see the video!
ReplyDeleteThis collection is just so cute! I never thought to use the bows for a garland- LOVE!
ReplyDeleteSo super cute my friend! Awesome video too!
ReplyDeleteHow cool is this! Really gives me the 'I want to play with it' feeling. Great job Shannon, love it xx
ReplyDeleteLove the fun and bright colors, thanks so much for sharing the how to video Shannon!
ReplyDeleteSo cute, Shannon! I loved the video and I can identify with your bull in a china shop comment when it comes to closing these boxes. Love the bow-tie garland -- adorable!
ReplyDeleteI love this and making those blocks as favors is a great idea! Thank you for posting this tutorial also, I have such a hard time figuring things out myself. My brain is full..lol.
ReplyDeleteThanks for the clever tip for your boxes..using the also clever tip from my dear friend Rachel!
ReplyDeleteLove your project and the garland!
I love the bright colours Shannon! Great project! :-)
ReplyDeleteGreat video Shannon!
ReplyDeleteEnfin une carte de naissance petit garçon. Merci pour cette vidéo.
ReplyDeleteBonne journée de France.
This comment has been removed by the author.
ReplyDeleteThis comment has been removed by the author.
ReplyDelete