Thanks goodness it's Friday - seriously - and thank goodness it's time for TGIF Challenges!
This week's theme is probably hitting too close to home for some of you...
Maybe your kids have already gone back. Maybe they're going back soon. Maybe your baby is starting school for the first time this year (oh, I can't even deal with this - my little man doesn't start until next September and I'm already emotional!)
Today, I thought I'd feature a little start-of-school gift. This could be something special for your child, or a sweet gift for your little one to bring to their teacher on their first day.
The sentiment on this one has two special little features - first of all, it's a Paper Pumpkin stamp - and you KNOW how I love my Paper Pumpkin! Secondly, the stamp is straight. But straight just wouldn't do, and this is why I love photopolymer - using your fingers, gently curve the sentiment as you adhere it to the block, then press firmly to hold it in place. Kablammo! Custom curvature!
Take a few minutes to hop over to TGIF Challenges and see what the other designers have up their sleeves this week, then join us with your own challenge entry - I'd love to see what you come up with!
Enjoy your weekend with your kiddos (or your weekend without!!!) and see you again soon!


I absolutely LOVE this. Can you explain where you use the circle puch and where the hexagon is used? Also how many pieces ned to be cut for an "apple" that size! Thank you so much! Love yoir blog- I check it regularly and just afore your creations.
ReplyDeleteHi Rosemarie! It's so funny that you asked - I was considering making a video tutorial and then talked myself out of it. Dang!
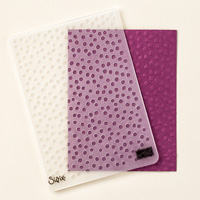
DeleteThe apple is made from a total of 12 circles, each cut from the largest circle punch. Emboss each circle, then score it in half. From there, I cut a large notch in the top of each apple with the "V" side of the hexagon, then fold it in half, and use the flat side of the hexagon to clip off the bottom of it. Do this with each piece (I lined them up with one that had been previously cut to ensure they were all the same) and then glue them all together with the circles folded. The last one will then wrap around and be glued to the first to create the apple. From there, add the stem and leaf and you're done.
Clear as mud? Or should I have done that video?? :)
Thank you so much for takimg the time to explain this. Again just love it!
DeleteLove this cute apple, thanks for sharing Shannon!
ReplyDeleteI am an old Twilight Geek too so the photo is PRICELESS!
ReplyDelete